Lab 1: Docker and PythonWinter 2026
This lab seeks to help introduce you to the Docker and VS Code development workflow that the course uses for most of its projects, as well as to help you avoid some pitfalls with the use of Python in Project 1. You will set up Docker for use, learn how to use some helpful tools in Python, do some visual debugging, and track down a nasty bug that many past students have run into!
Useful Links
Setup
If you haven’t already, follow our Docker guide to learn how to set up Docker on your computer. This will be useful for all the labs and projects in this class.
To get the code for this lab, create a repo using the GitHub template. Make sure to make this repo private. Clone the repo onto your system, then open it in VS Code. If you successfully set up Docker, you should be greeted with a pop-up in the bottom right asking you to reopen the directory in the development container; do so now! After some time taken to build the container, you should be greeted with the lab file in a directory and a terminal connected to the container (as shown in the Docker guide). If you’re having trouble at this point, please come to office hours or put up a post on Piazza describing in as much detail as possible what is going wrong—having a working Docker installation is essential for the course (which is why we’re making sure that it works in this lab!).
Tasks
This lab contains five tasks. One is to ensure you have Docker setup correctly. The other is to help you get familiar with Python.
Validation of Docker Installation
Open a terminal in the VS Code window (using the keyboard shortcut
“Ctrl + `“), at which point you should be greeted with a prompt inside
the container. Try running the command whoami.
If it outputs eecs388, you’re good to go! If it outputs anything else,
you’ll need to go back and fix your Docker setup. Come to office hours or post on Piazza if you’re stuck.
Task To generate what you’ll submit to the Autograder, do the following:
- Put your uniqname in the file
uniqname.txt(must be done first!) - Run the following command in the terminal:
tr -d ' \n\r\t' < uniqname.txt | cat - ~/.shhhh | openssl dgst -md5 -binary | xxd -p > openssl_output.txt
If you’re curious, here’s what each part of the command does:
tr -d ' \n\r\t' < uniqname.txt |
Read the file `uniqname.txt` ignoring whitespace |
cat - ~/.shhhh |
Concatenate the output of the previous command with the contents of ~/.shhhh |
openssl dgst -md5 -binary |
Compute the MD5 digest of the output of the previous command |
xxd -p > openssl_output.txt |
Express the output of the previous command as hexadecimal and save it to openssl_output.txt |
Altogether, this will generate a value that lets the Autograder check that your installation is working properly.
(For the curious: I wonder what is in ~/.shhhh!)
The files uniqname.txt and openssl_output.txt are now ready to be submitted.
Python
Part 1: Bytes
When implementing crytographic algorithms (such as in Project 1), you perform a lot of
operations on bytes. Luckily, Python has built-in datatypes for this exact purpose.
They are called bytes and bytearrays. Here you will get some practice working with
them before Project 1.
Byte Literals
Byte literals work just like strings in Python, except you put a b before the opening quote.
You can write out each byte as a hexadecimal value:
b'\x01\x02\x03'
Or you can put ASCII characters, and each will be encoded as bytes:
b'Hello, world!'
Task In the file part1.py, make a variable called eecs388.
The variable should hold a bytes object that stores the bytes 0x03 0x08 0x08.
Converting to bytes
Often times you’ll need to convert other datatypes to bytes.
Task In the file part1.py:
- Write a function called
str_to_bytes(s)that converts the stringsto abytesobject using ASCII encoding, then returns the converted value - Write a function called
hex_to_bytes(s)that converts the hexadecimal stringsto abytesobject, then returns the converted value - Write a function called
int_to_bytes(n)that converts the integernto abytesobject with length 4 using big endianness, then returns the converted value
Try looking up how to perform these conversions online if you don’t already know to do them. They can each be done with a single line of code.
bytearrays
Normal bytes objects in Python cannot be modified in-place. If you want to modify them, you’ll need to convert them to a bytearray object.
bytes_object = b'\x01\x02\x03'
bytearray_object = bytearray(bytes_object)
You can now index into the bytearray object to modify the value.
Task In the file part1.py, write a function called
set_end_to_zero(b) that sets the last byte in the bytearray b to 0x00. The function
shouldn’t return anything, it should just modify the bytearray in-place.
Part 2: The Python Standard Library
The Python Standard Library has tons of useful tools built-in, way more than C++. You’re welcome to use any of it in this class. Scroll through it to see all the ways it can help save you time and effort.
Task In the file part2.py, write a function called
sha_256(b) that returns the SHA-256 digest of the bytes object b. Look in the standard
library for something that can help you with this. Read the example code and documentation
to help you learn how to use it.
Part 3: Debugging
Using the Visual debugger in VS Code will likely be a great tool throughout the semester. If you’ve never used one before, now is an excellent time to learn. They can save you so much time tracking down bugs. Luckily, the Docker workflow allows it to come working with no extra steps on your end! Here, we’ll run through a quick example to get you up to speed with the interface.
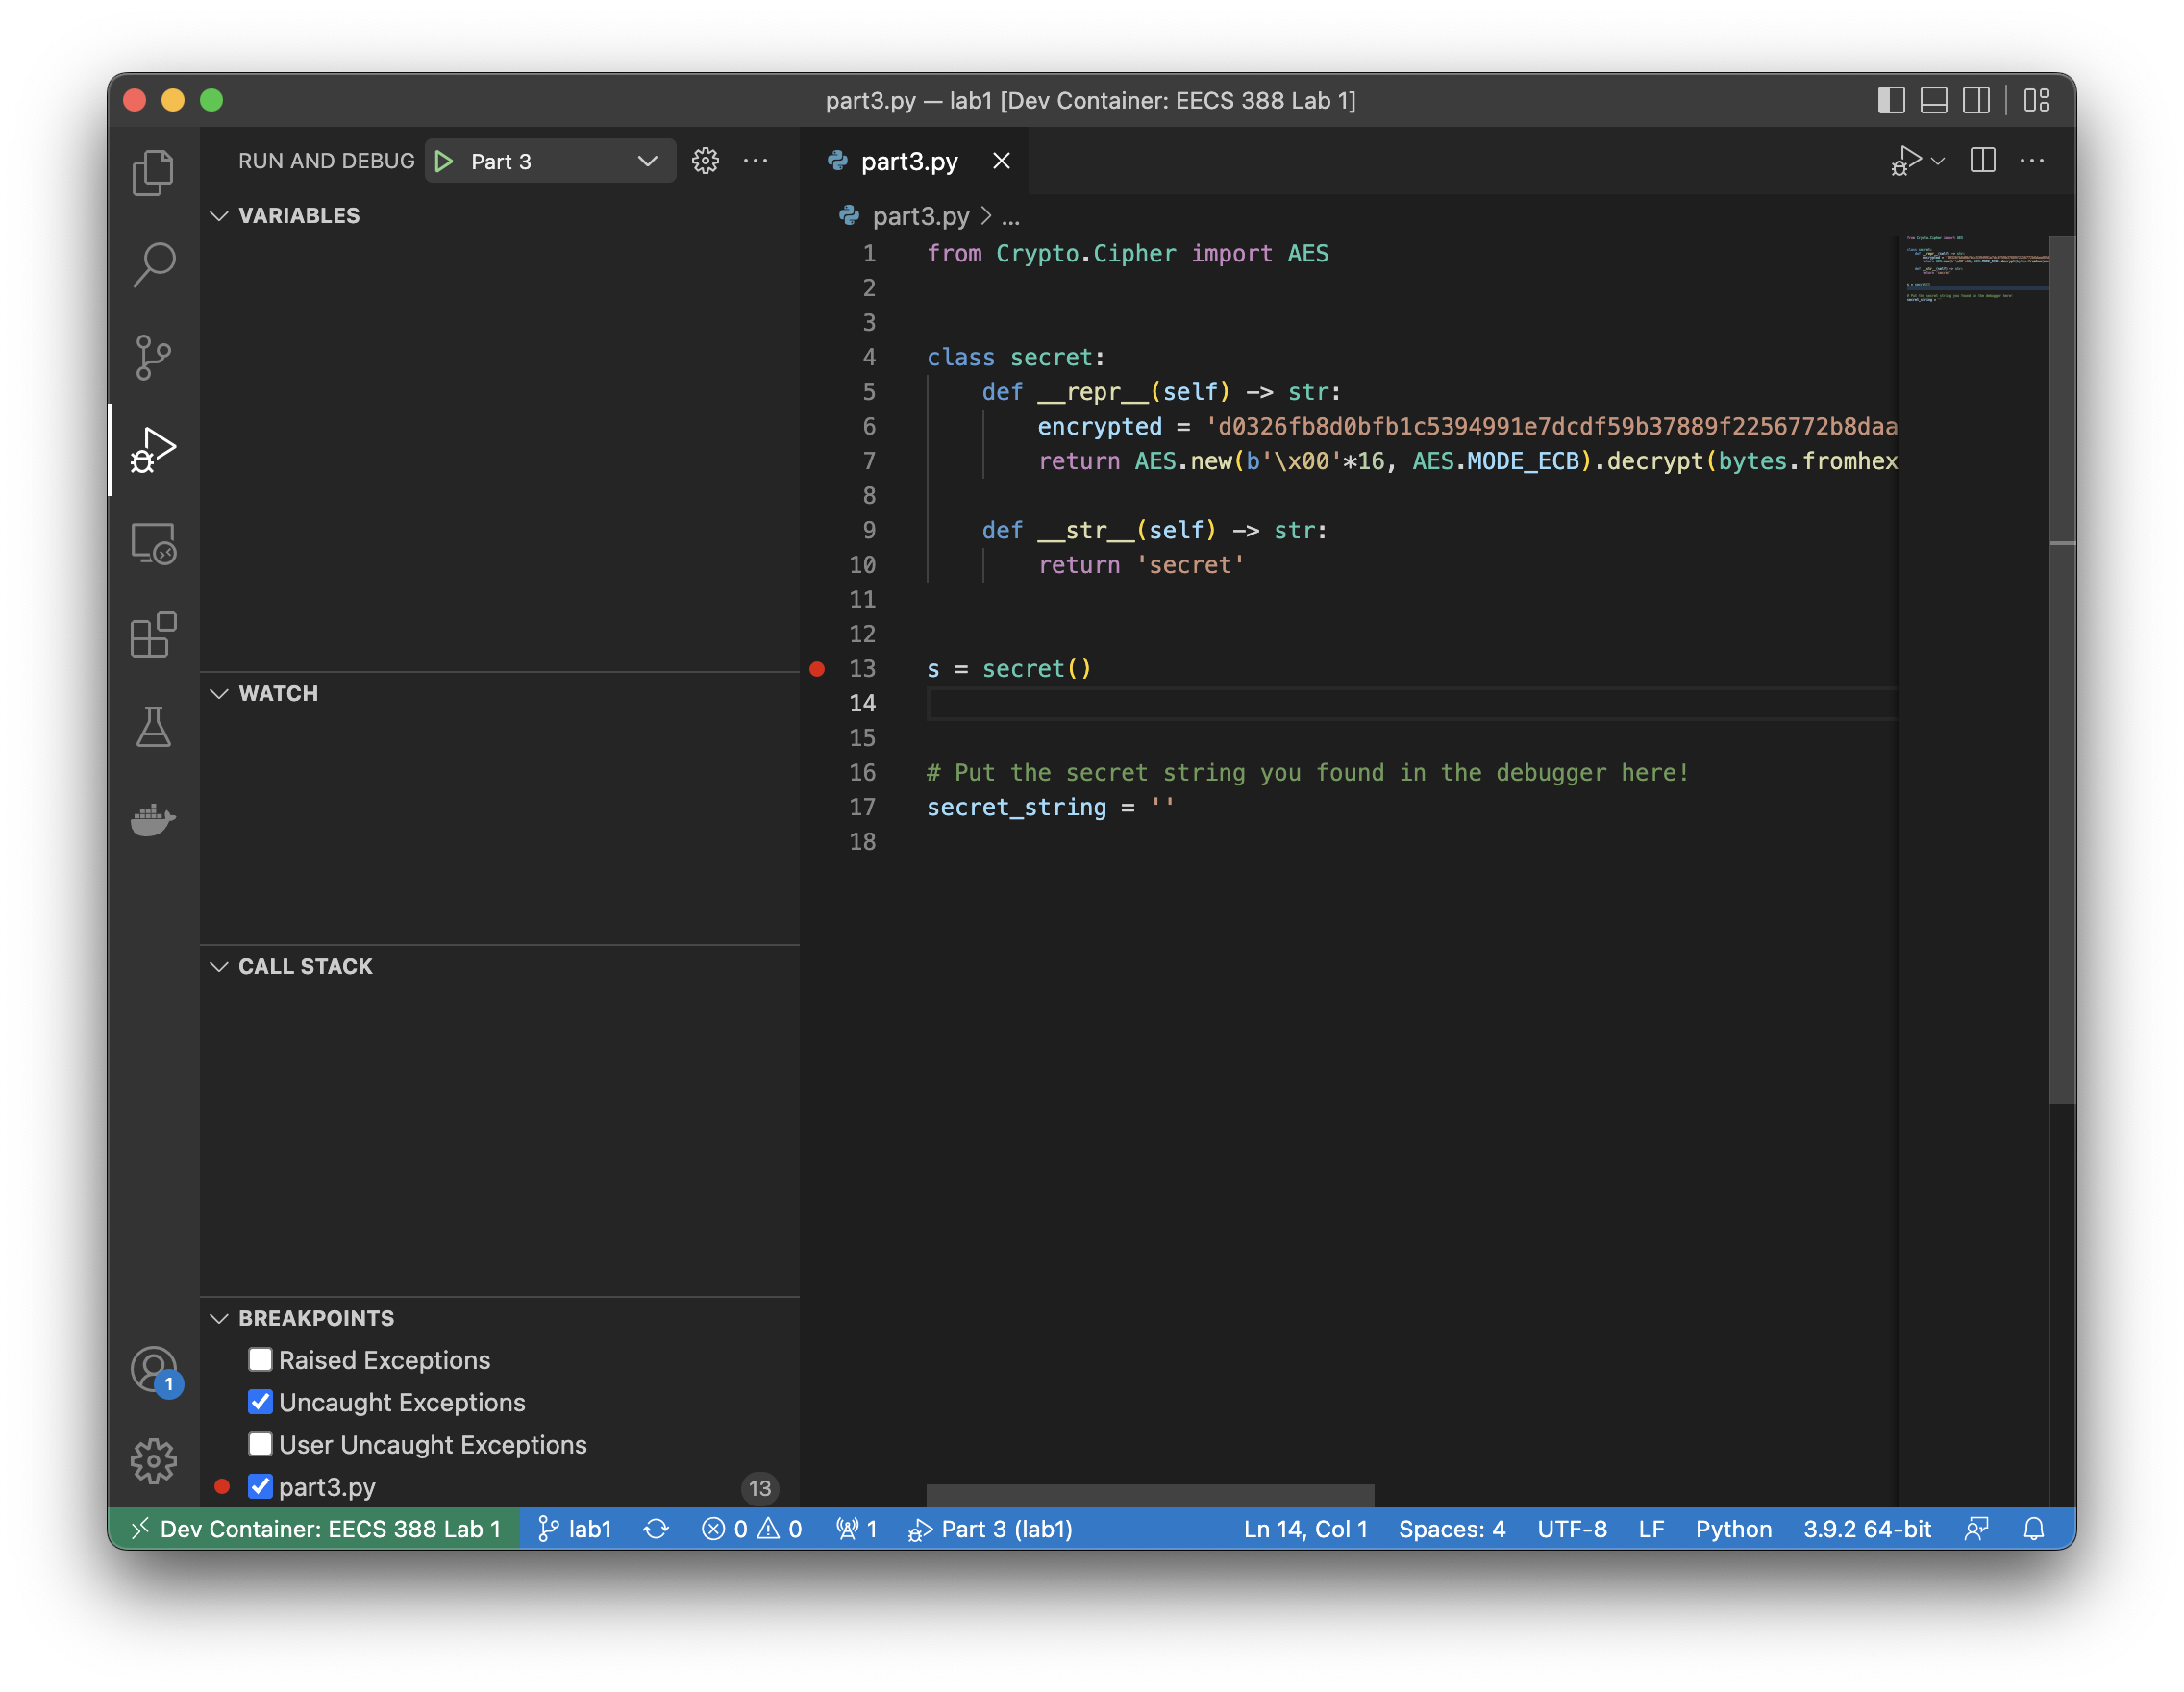
Task First, open part3.py and hit the debugging
symbol on the left side of the window. Set a breakpoint on the line with s = secret()
by hovering over the line and clicking the red circle. You should now see that the circle
stays lit and that the line appears in the bottom left, indicating that a breakpoint is set.
Confirm that the “Part 3” target is selected in the drop-down menu in the top left,
then hit the ▶️ button to begin debugging.
You should see that the program stops on the breakpoint you just set.
Step forward by 1 line so that script finishes constructing s.
Examine the variables section on the left side of the window,
which shows you the values of any variables in the program at this point.
Under the “Locals” section, s now appears:
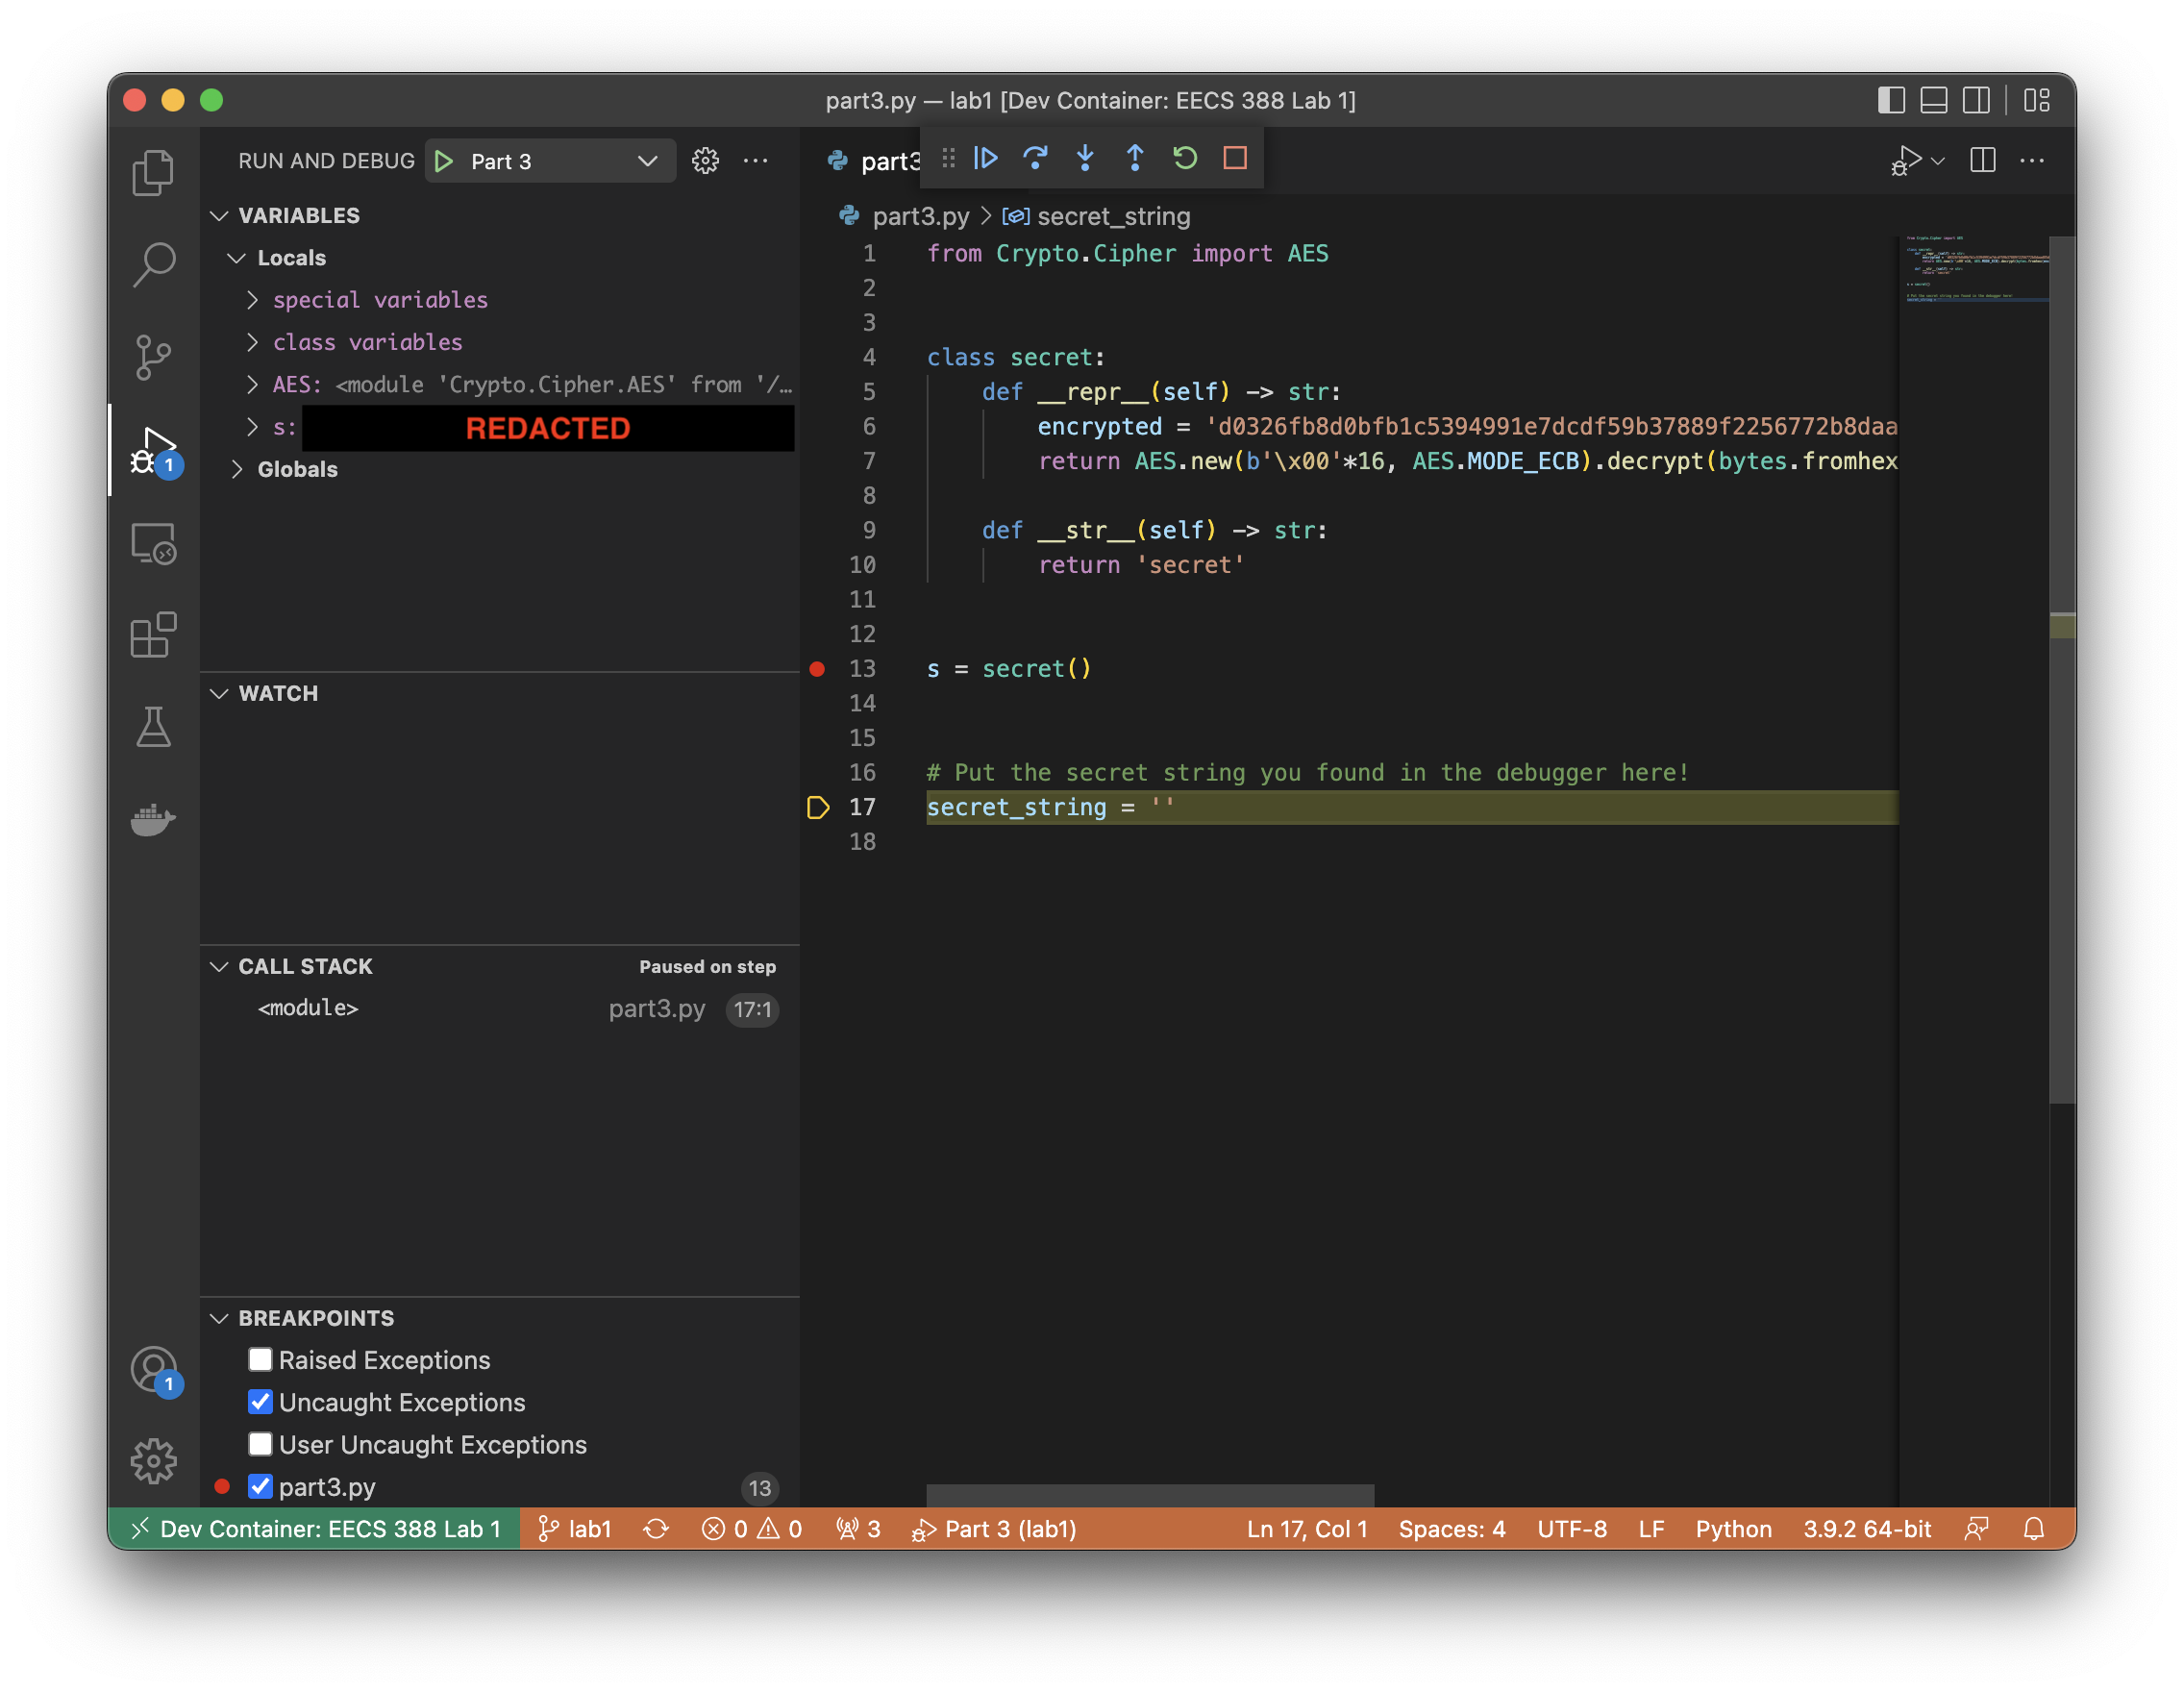
The secret class has a special method, __repr__, that changes
how objects of the class are displayed in the debugger (as well as in other places,
such as when the object is evaluated in interactive Python shells).
It’s hard to see what this __repr__ method does by looking at its code,
but by viewing the value of s in the debugger, it becomes quite clear!
Edit the script to set the secret string that you found while debugging. This is how the Autograder will check that you got the debugger working.
Part 4: Bug Fixing
Finally, you’ll be responsible for fixing a bug that has historically caught many students in Project 1. We hope this will stop you from making the same mistake!
Examine the description of the square_list function according to its comment,
then carefully consider the output you see when running the script using the command
python3 part4.py. Is the function acting according to what it says it should be doing?
Task Your final task for this lab is to fix
the bug in the square_list function. You might need to do a bit of research into
what is happening here, along with possible ways to fix it.
(There are many ways to go about this; there’s no one right answer!)
While this may seem daunting if this is your first introduction to Python,
we think that this type of self-directed exploration best helps
you to remember what you’ve done here when you need it later (which,
trust us, you probably will!). Happy hacking!
If you’re stuck, try running the code in Python Tutor to visualize what’s going on.
Submission
Submit the following files to the Autograder by the deadline:
uniqname.txtopenssl_output.txtpart1.pypart2.pypart3.pypart4.py